Showing posts with label Green. Show all posts

Sunday, 14 April 2013

Crazy Coloured Nails for Spring

I should definitely feature more nail posts on this blog. I have so many nail polishes and my nails are painted more often than not, but I think I’m probably too fussy when it comes to taking pictures of my nails.

There was the extra-long winter to contend with this year I suppose, which was a constant battle against strangely blue-toned light in all my photographs. And then there are the occassions such as today when I painted my nails with an awesome nail varnish and then, through no fault of the product but rather due to my own impatience and inability to sit still for more than two minutes I managed to smudge and dent it all over the place.

Case in point, Illamasqua’s nail polish in Radium, a shimmery toxic lime green:

IMG_4573

This nail varnish has the perfect consistency, is opaque in two coats and dries fast in about ten minutes. I am simply a dope.

I didn’t want to add a third coat of Radium though so I thought I would try to save the day with a coat of crackle nail polish. This is really where crackle nail polish comes into its own, I think. Barry M’s crackle top coat in blue really saved the day.

IMG_4575

Bam! Now that’s what I call colour. This is a seriously funky colour combination and the crackle hides all those pesky dents and smudges perfectly. Phew!

Saturday, 8 December 2012

From the Archives

I haven’t posted anything for almost a month, mostly because it’s been so dark here in London now that winter’s coming that all my photos look really crummy lol, so I thought that I’d post a picture taken a few months back when it was a bit more bright and summery.

Here I’m modelling yet another pair of cat’s ears (I have four now, I get a kick out of collecting them for some reason – these particular ones were Halloween specials from Accessorize) and some peach and green eyeshadow, probably Snatch and Grafitti by Urban Decay.

IMG_7979

Stay tuned for some wintery posts coming up this week!

Wednesday, 14 November 2012

Shiny Ice-Cream Nails

Just have a quickie mid-week nails post today. This is my MUA nail varnish in Pistachio Ice Cream (£1) with a sparkly iridescent blue top coat by Andrea Fulterton.

2012-11-11

Top: two coats of MUA nail varnish in Pistachio Ice Cream

Bottom: with sparkly top coat from Andrea Fulerton Nail Boutique trio in Petrol in the Water.

This is the first MUA nail varnish from their £1 range that I’ve tried and to be honest, it’s pretty good for £1. The bottle is quite small at 6.2ml, but I actually quite like small bottles of nail varnish as I practically never finish full sized bottles off before they start going gloopy anyway. Unfortunately that does make the brush quite small and fiddly, and to be honest it’s not the best quality and a bit splayed, but as long as you take your time you can still paint your nails with it fine. The colour was opaque in 2 coats.

I really like this Andrea Fulerton polish. It’s a duo-ended bottle and you can use either colour separately or paint the top coat over the darker shade to create a completely different third colour. I will definitely feature some pics next time I wear this because the name is spot on – it really does look like the polarised reflections you see with Petrol in the Water.

Sunday, 21 October 2012

Green + Gold

I think this colour combo is going to become one of my Autumn staples – especially since it only takes about 3 min to apply.

I wore a cream blush in the photo below which is a great product to use when you want to add/maintain a glow to the skin, but the shade I picked was a tad too light for the eyeshadow I think. Next time I would go for a rosier shade to avoid looking washed out.

IMG_2609-001

IMG_2615

IMG_2616

Above: green eyeshadow to the crease, light golden brown blended across the crease and lower lash line.

IMG_1942-001

Above: I used the shades Graffiti (1) and Shag (2) from the Urban Decay Deluxe Palette over a creamy eyeshadow base.

Sunday, 23 September 2012

Peach and Green

I think that peach and green is a lovely eyeshadow combination. There’s also something quite autumnal about it – a mixture of the colours of the leaves and vegetables that are coming into season at the moment perhaps, like, um…carrots and pumpkins??

IMG_8187

IMG_8185

I used quite soft shades in this look which I think makes a lovely brightening combo for the daytime, which was particularly useful for me this weekend as I’m recovering from a cold and I felt that my face was looking a bit washed out and dull.

These colours also looks great with more intensity as an orange/forest green combination – I posted a look with those colours here.

Monday, 27 August 2012

Everyday Look for Work Summer 2012

IMG_7965

IMG_7966

I’ve been experimenting with neutral eyeshadows a lot more recently but I still like my flashes of colour so this is a great way to combine both.  It’s also super-quick to throw together, so perfect for work, when I only leave myself about 5 minutes for getting ready in the mornings!

Here’s what I used to create this look…

IMG_1863

I don’t bother with foundation during the week and stick to tinted moisturiser instead to save time.  I take out shine down the centre of my face with some powder then whack a light bronzer along my cheekbones (I don’t bother using bronzer to contour and instead just use it to add some colour to my face in the areas the sun would naturally hit first) and a bright blush on my cheeks.

I used Bondai bronzer by Accessorize which I also featured in more detail in my previous post, and my newest MAC blush in Solar Ray (also featured here). There are loads of pictures of it on my blog already but I think it’s really pretty so I’m going to include another one here anyway.

2012-08-27

I have oily eyelids so in hot weather I use a silicone based eye primer to make sure my make-up lasts through the working day. The MUA eye primer is a bargain at £2.50 as it works just as well as other much more expensive primers of this type that I’ve tried before.

IMG_1874

I can’t cope with more than two shades of eyeshadow for work, it just becomes too complicated for me otherwise. Lately I’ve been using shades 4 & 5 from the top row of the MUA undressed palette – I featured many more pics and details in this post. I use the shimmery brown over my lid to the crease then tuck a bit of the matte brown into the crease with a rounded blending brush.

IMG_1876

The hero of this look is in my opinion the amazing green eyeliner – which is now discontinued!!  It’s from the range Glam Metallics by Collection 2000 which were such amazing products that I can’t believe that they were unpopular enough to be discontinued. You get a massive 6ml of eyeliner in the packaging – for comparison most of my other eyeliners are under 2ml.

The brush is thin but the consistency is nice and thick, a combination that makes for a very forgiving application. It’s very waterproof and doesn’t budge on me until I remove it at the end of the day with an oil based eye make-up remover.

2012-08-272

IMG_1884

Finally, when I’m going to work I tend to finish off my look with mascara and a nude lipstick or gloss on the bus. Actually I have developed the really bad habit of carrying about 15 lip products around with me at all times in my handbag – I think I should start concentrating on finishing off a couple to make my load easier to carry! I know some people hate it when they see people doing their make-up on public transport but I say hey, if it gives you an extra 5 min in bed then I’m all for it.

Sunday, 12 August 2012

Limeade

So far this month this fizzy green eyeshadow has been my favourite colour – it seems to strike the perfect balance when it’s too hot and light for deep colours but not quite hot enough to go totally tropical with my make-up colour palette.  At weekends I like to pair it with bright pink – here I’m wearing pink on my cheeks and lips.

IMG_7740

IMG_7743

The green that I used is from the Sleek Monaco palette, which was a limited edition release (part of the Mediterranean collection) last May.  I didn’t actually use it that much last year and just started re-discovering it this spring. It has some great colours in it and I’ve been getting good use out of it over the past few weeks. The green is light, bright and shimmery and I think it looks great as a block colour across the lids paired with a generous flick of black eyeliner. It lasts all day on me on top of a primer.

2012-08-113

The eyeliner that I used was “Flirty Flick” by Look Beauty, a brand that I’d never actually tried before.  I bought one of their trio eyeshadows in Superdrug this week as there was a special offer to get an eyeliner free.  The normal price is £5.

The liner has a nice formula that’s really long lasting, but I wouldn’t recommend it for beginners as the applicator is a very stiff felt tip that’s quite difficult to control.

2012-08-112

On my cheeks I’m wearing my favourite blush of the moment, a mineralize skin finish by MAC from their summer 2012 “Heavenly Creature” collection in the shade Star Wonder.  I was umming and ahhing over whether to get anything from the collection as basically MAC is pretty expensive, but eventually I bought this in Duty Free when I went on holiday a couple of weeks back as it was a good few quid cheaper there.

The pattern is kindof weird but cool – outer space inspired swirls of raspberry, light pink and gold.  I think this would suit a wide range of warm-toned complexions as I’m pretty pale but I’ve also used this on friends with medium skin tones and it looked great on them too. I sweep it across my cheekbones with a duo-fibre stippling brush for a light pink shine, but the colour is very buildable for more intensity.

2012-08-11

IMG_7751

Finally on my lips I’m wearing a product from Revlon’s Just Bitten range, the duo-ended lipstain pen + balm in the colour Passion.

2012-08-111

You’re supposed to colour your lips in with the pen then apply the balm on top to moisturise and add shine.  The colour is very long lasting, but I’m not a big fan of this product. It’s actually quite difficult to get an even colour and I don’t like the fact that you have to add a lipbalm on top to get any moisture. You can see the finish a bit more clearly in the swatch on my arm below than on my lips.

IMG_7761

IMG_7771

There are loads of pen-style lipstains on the market from various brands at the moment but I can’t see myself buying any more any time soon.  I did pick up a completely different type of lip product this weekend though to show soon that I am excited by – watch this space, pics + descriptions will be coming to Chilled Pink Grapefruit very soon!

Sunday, 27 May 2012

NARS Eyeshadow Duo in Rated R

I keep thinking this is called Rated X!  What does Rated R stand for anyway?

IMG_6176

Anyhow, here’s what you get for your £23.50:

IMG_6183

Now THAT’S what I call colour!!  These eyeshadows are seriously bright in the pan.  I bought this because I really wanted a good quality chartreuse eyeshadow and in fact it is my favourite of the two.  I tend to use the blue as a crease colour but I find it difficult to blend, whereas the green I just pack onto my eyelid as a block colour which works just fine.

I used my favourite eyeshadow brush set from Ecotools to create a bright look using Rated R yesterday.  You can see I used a tiny shader brush for the green and a fluffier blending brush to work with the blue.

IMG_6173

In all honesty I do find this eyeshadow duo really difficult to work with.  This simple look below took me ages fiddling around with to create a final effect that I was happy with and as you can see it was still patchy in the end.  Bit more green here, bit more blue there, bit of blending, bit more eyeshadow…phew.  While I do think the green is a great colour and just what I was looking for, let’s face it – for £23.50 you really want to end up with an eyeshadow that you love, and I just don’t quite think that I do.

2012-05-261

Sunday, 1 April 2012

Tree Hugger nails

I bought a ton of new make-up this weekend…but don’t worry, I actually broke my New Year’s Resolution not to buy more make-up ages ago so all my guilty feelings are out of the way already ha ha.  I thought I’d start working my way through posting about my new goodies with a quick post on one of the new nail varnishes that I picked up.

Every spring I always go on the hunt for the perfect green nail varnish.  Ideally I’m looking for a pistachio, but this shade from China Glaze looked like good fun and only worked out at £5 thanks to a special offer (there’s a Sally’s Hair and Beauty on Shaftesbury Avenue in Soho that has a limited range of China Glaze polishes) so I decided to pick it up anyway even though my search for my ideal green goes on.

2012-04-01

I only discovered China Glaze polishes in December but now I have five shades and a topcoat and I’m becoming a big fan.  They’re probably my second favourite brand of nail polish after BarryM even though the quality of China Glaze is slightly better but you have to love BarryM for their amazing range of colours at only £2.99 a pop (China Glaze costs around twice as much).

Sunday, 18 March 2012

Birch Bark Nails

I’m back!  I finally got round to fixing my laptop.  To be honest I was kind of enjoying the peace and quiet that having a break from my laptop turned out to be!

Anyway to ease myself back into the habit of blogging I thought I’d start with a really quick post to show how I’m wearing my nails at the moment.  I picked up a couple of new BarryM Instant Nail Effects crackle nail polish in blue and white (around £4 each) on Friday and painted them over a greige (I used Smoky Canvas by Revlon).  I think the nails with the white crackle on top really look like silver birch bark.  I quite like this colour combination.

2012-03-18

While I’m blogging I might as well pop in this photo of the eye make-up I wore today.  Spring seems to be in full swing here in London now so I wanted to wear a bit of green and channel some zingy spring energy.  I used the Nars eyeshadow duo in Rated R which I bought recently. The colours are really bright, just how I like them!

2012-03-181

Thursday, 8 December 2011

Daytime Pumpkin Eyes

I had the day off work today (hooray!) and came up with this bright but wearable look whilst playing around with my current favourite eyeshadow, Vapour by Illamasqua which I picked up a couple of weeks ago on sale.  It’s an intensely pigmented but very wearable matte orange.  Today I teamed it with a dark green eyeliner.  (Pls see also my Autumn 2011 colour chart for more seasonal colour inspiration).

2011-11-133Above left to right: powder eyeshadow by Illamasqua in Yearn and Vapour – both used in this look

IMG_4339

I applied Yearn over an eyepencil as the dark green eyeliner.  I’m also wearing my favourite cold weather blush in Scandal by Accessorize, which looks very red in the pan but applies to the skin as a lovely subtle golden rose shimmer.

IMG_4341IMG_4347

I’m wearing some funky golden monkey drop earrings that I picked up on sale in Topshop a couple of months ago.  I have buckets of crazy costume jewellery like this already but I just couldn’t resist these when I saw them!

IMG_4342

I just wanted to do a quick post tonight but I’ll hopefully be back tomorrow with some amusing shots of some of my latest crazy hair/head accessories.

Saturday, 26 November 2011

Forest Eyes

I bought a new palette of neutral shades in TK Maxx yesterday so I decided to try one of the eyeshadows out today before reviewing it on the blog.  I thought it would compliment my new Illamasqua matte eyeshadow in Yearn nicely.  The neutral that I wore is a bit of an orangey shimmery peach and Yearn is a deep forest green.  This is also the first time I’ve worn green this autumn and I’ve been meaning to for weeks now, ever since deciding on my autumn colour chart so I was glad to have gotten round to it at last!

2011-11-26

I also added a very thin slick of shimmery brown eyeliner just to pull the two colours together.  I really like the colour combination - I just can’t help but think of Robin Hood when I see browns or golds and greens together.  It’s also a great way to wear Yearn as it’’s such a deep, intense colour it could easily overpower a look, but the shimmery orangey peach just seems to balance it out perfectly.

2011-11-261

It’s been getting noticeably chilly in London this week (finally!  Just before December!  It’s almost been t-shirt weather up until now which has been very weird) so I wasn’t going to go out today without a hat.  Usually I wouldn’t bother with make-up on my lips if I were wearing a lot of colour on my eyes but I thought because of the hat I could get away with a bit more make-up so I wore a shiny neutral lip with it.  I’m generally very boring with my lip colours because I just hate it when my lip colour starts to fade.  Unfortunately this lip look didn’t survive for long outside as I went to the German Christmas market that’s open at the moment near my flat and had a hotdog.  Still I did like the colour while it lasted - just very demure and shiny and healthy looking.

Sunday, 4 September 2011

Grass Eyes

I went to the flower market on Columbia Road near Old Street with a friend today so to mark the occassion I created an eye make-up look inspired by grass blowing in the wind.

2011-09-04

IMG_1935-1

I used Urban Decay primer potion as a base then applied a light yellow eyeshadow all over my eyelids up to the brows.  I then patted on a light green on the outer corners of my lids and along the outside of my lower lash line.  I applied the green in a very approximate fashion as I just wanted to get some colour on without worrying too much about the shape.  I wanted to use a green liquid liner for the next step but to be honest I couldn’t remember where I’d put mine (oops!) so I had to use a green eyepencil instead.  I would say that this has to be done with a very smooth eyepencil, as you really don’t want to be tugging away at your poor eyelids as you create the “blades of grass” effect – ouch.  I used a No. 7 metallic eyepencil which is lovely and creamy and applies with practically no pressure.  I just applied strokes of green outward across the outer 2/3 of my eyelids in a triangular shape and lined along my upper lash line.  I then finished the look with a generous helping of black mascara, and that was it – simple.  (I’m also wearing foundation, radiance powder on my cheeks and lipgloss in the photos above).

The flower market was amazing and I definitely recommend a visit if you live in London.  We did get caught in the rain but on the plus side that meant that we got even more bargains as the flower sellers tried to encourage people to keep spending instead of just rushing off home.  Here’s a quick collage of some of the flowers I currently have adorning my home – the bottom row shows two of my new chilli plants, which have the double benefits of being both colourful and edible, yum!

2011-09-43

Sunday, 31 July 2011

Grass Green Step by Step

This is a rather exciting post for me as I thought I’d attempt to do a step-by-step photo tutorial of my make-up for the first time today.  As I discovered it’s actually pretty tricky to do your make-up whilst attempting to photograph it at the same time, so things might get a bit wonky from here on, but anyway I had fun and that’s the main thing I guess!

I love grass green eye make-up because it feels so fresh, which is perfect for the hot weather we’ve been enjoying here in London this week.  So without further ado, here’s what I got up to today.
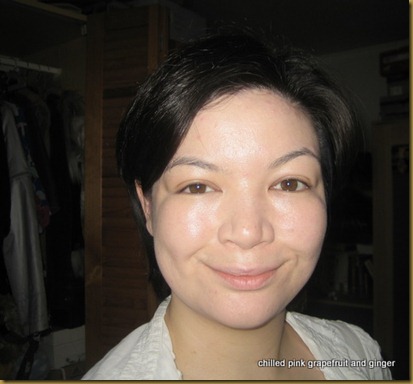
Here’s how it all began, with me with just a touch of foundation on.
IMG_0341

I started by applying a thin layer of eye pencil all over my lids as a base.  Mine was a lovely lime green by Gosh which has a nice soft consistency that just glides onto the skin.  I happened to pick mine up 1/2 price in the January sales which was an added bonus but if you like eye pencils then I do recommend Gosh’s as they’re a good buy.
2011-07-311

I stroked a thin layer of pencil all over my lids up to the crease – no need to worry about being neat at this stage.  I then stroked it out to slightly above the crease using my ring finger to create a thin even base.

2011-07-312
I then took a grass green powder eyeshadow on a shading brush and placed the colour on the outer 3/4 of my lid up to the crease.
2011-07-314
OK so now you’ll have created something that looks like this.  Hopefully you can see how I’ve left the inner corner of my eye free from shadow.2011-07-313
At this stage I like to blend the colour from the crease up with a fluffy brush.  I don’t blend the colour that’s on the eyelid as that would just blend the colour out to nothing.
IMG_0367
I like to add a very light reflective colour to the inner corners of my eyes to waken them up.  I like to use quite a lot of highlighter in this area rather than under my brow, starting at the inner corner on the upper lid and blending in an upwards arc into the crease, then taking the colour along the inner 1/3 of the lower lash line.  My current favourite highlight colour is this shiny shiny light green called “Moshi Moshi” from my recently purchased “Cutie” quad by MAC but any light colour will have the same effect of “opening up” the eyes.  I use a slightly rounded pencil brush to apply the colour.
IMG_0408
IMG_0369
OK so at this stage my eyes were looking like this.  I really wasn’t joking when I wrote that I liked a lot of highlighter in this area of the eye ha ha:
IMG_0370
Definitely nice and wide-awake looking I think you’ll agree!  Best blend those colours out a bit so I don’t look quite so stare-y and scarey…
IMG_0371
That’s the main body of the colour taken care of so now I started adding some definition.  I used my lime green eye pencil along the outer 2/3 of the lower lash line, following the line to join it with the colour on my upper lids.
IMG_0372
Next, I ran my favourite green liquid eyeliner along the upper lash line (this was a particularly difficult picture to take!) It’s a Glam Metallics liquid eyeliner by Collection 2000, cost about £3, and is basically fantastic.  If you like coloured eyeliners you must check this range out, they are so easy to apply and really do last all day long (they are waterproof, but easy to remove with a good eye make-up remover).
2011-07-315
I then added some brown eyepencil along the waterline for some added definition and added a couple of coats of my favourite everyday mascara to finish the look, voila:
IMG_0382
I also think that pink cheeks go particularly well with green eye makeup so I like to wear this with a generous dollop of pink blush (shot below with my current favourite mascara, collagen mascara by Accessorize).
IMG_0400
The final effect:
#
That’s all for today folks, hope you enjoyed my first step-by-step look.