Monday 29 August 2011

Matte blue + brown

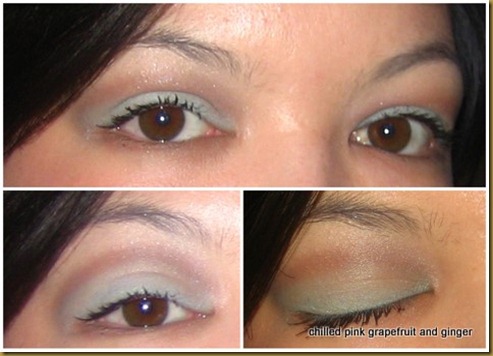
This weekend I wanted to create a softly defined look using some matte shades, but as I’m not really a neutrals kind of gal I decided to pop some blue into the mix.  Here’s what I came up with.

IMG_1490

2011-08-29

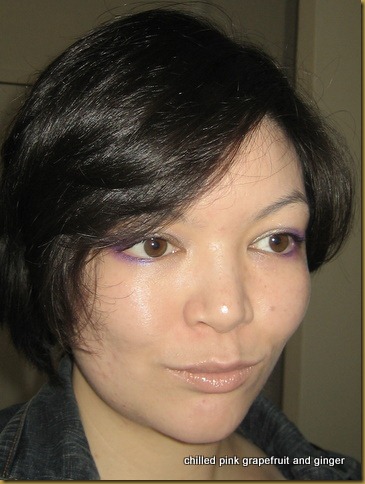
The crease is definitely defined, but as you can see in the full face shot the overall effect is actually quite subtle.

How I did it

I used a primer all over my lids then patted on a layer of pale matte blue eyeshadow (I just used an ancient cheap one that I had in my stash).  I blended the colour out at the edges before adding a second layer of blue and blending at the edges again.  I just did this to get the colour payoff I wanted; if I’d been using a more pigmented shadow I would only have needed one layer. I then used the edge of a flat eyeshadow shading brush to place a medium toned matte brown into my socket line just above my crease. The brown I used was by the Body Shop and applied like a dream…I would recommend using quite a pigmented shadow for this line because you don’t want to disturb the blue too much in the process of packing on loads of brown into the crease.  I then just blended the line until I had created the hazy band of colour I was after.  I then applied the same brown under my lower lash line and brought the line to join the line of the brown on my upper lid.  I then applied a matte highlight colour under my brow bone and whacked on loads of mascara, and finished off with some shimmery red blush on the apples of my cheeks and a neutral brown lippie.

I have to say that I do love the overall effect of this look – because there are no harsh lines it’s relaxed and laid back, and while it’s definitely polished, it’s still good fun.  A perfect daytime look for hanging out with friends I think.
Sunday 21 August 2011

Inspired by Orchids

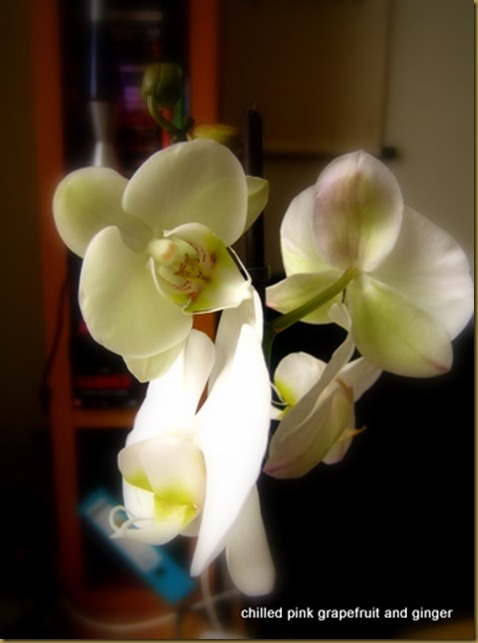
I’ve gone crazy for pot plants this week (I bought four!) and this gently colourful look was inspired by my lovely double stemmed moth orchid whom I have named Charlie.  (I like giving things names).

IMG_1435

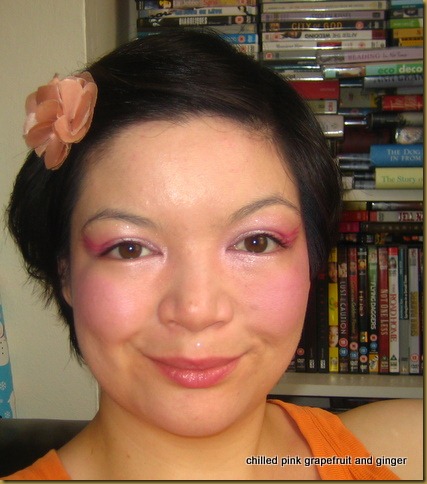
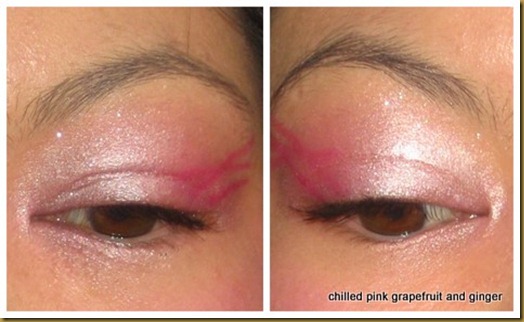
Charlie is mostly white with some gentle pink flushes and more vibrant and stark purply markings inside the flower.  Here’s the look I came up with.

IMG_1381

2011-08-213

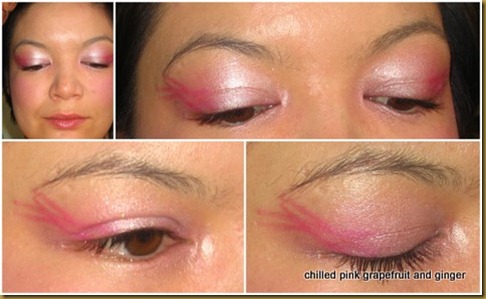
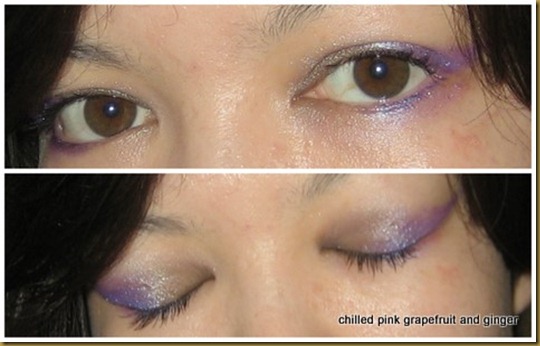
Both eyes are actually slightly different which I hope you can see more clearly in the comparison below.

2011-08-212

Bit of a weird set-up for my photo there, but I found it was the best way to illustrate the subtle differences in each eye’s make-up.

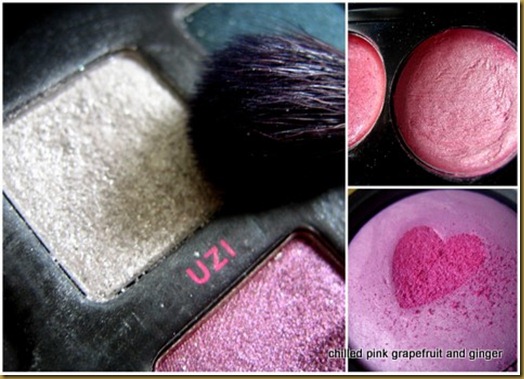
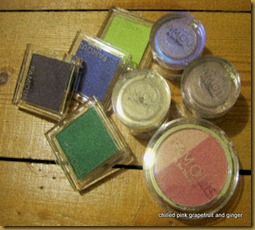
Here are the main products I used to create the look.

2011-08-22

I applied quite a thick layer of the pink cream from the Sleek primer palette (above, top right) all over my lids and on the lower inner corner because I wanted some of the colour to show in the finished look, though in hindsight this wasn’t the best primer to choose as it’s already begun creasing after a couple of hours – I guess it works best when you apply a very thin layer

Next up I used a smallish eyeshadow brush to pat on a sparkly white powder eyeshadow.  The one I used was exceptionally glittery and did have a lot of fall out, but I find that using a creamy base can help to “catch” the glitter as you work it out and reduces fall out.

Next up I loaded the tip of a slanted eyeliner brush with a bright pink powder eyeshadow.  Today I used a bright pink but I actually think that any bright colour would look great.

I looked down and held my eyelid taut with one finger then applied a few bold lines, each in just a couple of decisive strokes because I felt that helped create a more ad hoc feel.  I created slightly different lines on each eye.  I then went back to the large fluffy blending brush that I’d used earlier to blend the pink lines into the white on the eyelid using a circular motion.  The result was a hazy pink-white on the outer corner of my eyelids.  I then finished the eyes with a couple of coats of mascara.  I only have black mascara as that’s the natural colour of my lashes anyway but I think this look would work well with brown mascara as it was inspired by flowers and brown is a more organic colour.

I then added a pink blush (pictured in collage above, bottom right) and shiny pink lipbalm which I think pulled the whole look together nicely.  Now I think I’m ready to go out…to buy some plant food!

Friday 19 August 2011

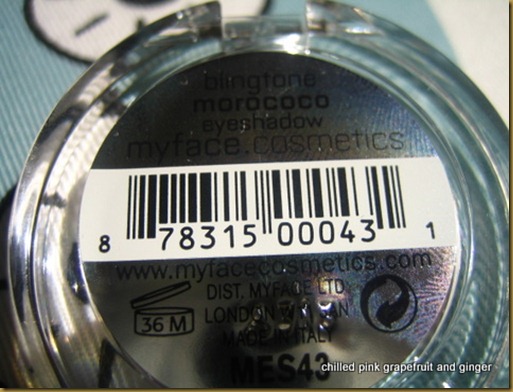
MyFace Cosmetics Blingtone Eyeshadow in Morococo

I haven’t posted for a while as I was away on holiday in Scotland for a few days, but now I’m back and have loads of catching up to do as I’ve been naughty and spent lots of money on lots of exciting new products – oh well, good news for my blog anyway I guess!

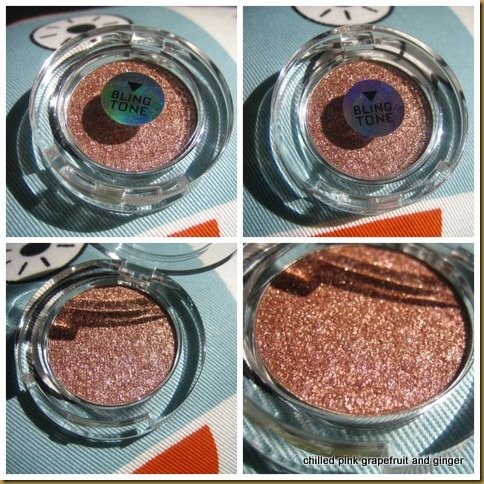
I’m going to start with a quick post to introduce the latest eyeshadow to join my collection, Morococo by MyFace Cosmetics.  Myface Cosmetics is a brand that I’ve heard of before but never really bothered to look at in any great detail in the shops.  The core collection has always looked a bit bland to me to be honest and their super sparkly “Blingtone” collection, while being exactly the kind of make-up that I am drawn to (namely super sparkly and colourful) has always seemed just a little expensive.  Anyway this week I went to Boots to check out some Pixi blushes but as the one I’m interested in was £16.50 I felt that was a bit expensive, so I ended up buying a Blingtone eyeshadow for £7.99 instead – when in all honesty I really didn’t need yet another sparkly eyeshadow at all and I should just have bought the Pixi blush that I went in to look at in the first place!

Anyway, enough of my shopping follies, let’s focus on the make-up since I bought it after all.  Usually a single Blingtone eyeshadow retails at £9.99 but Boots were doing a special offer and they were selling for £7.99 when I bought mine.  I’ve since discovered that the MyFaceCosmetics website is also currently running a 20% off plus free shipping special offer which means it works out at the same price if purchased there at the moment (not sure how long this offer is going to run for).  I’m not sure about the weight of the product but I would guess around 1.5g.  Anyway it’s not the cheapest and not the most expensive.

Blingtone products promise “dramatic, wet-looking shine”, and they certainly look the part in the pan – here’s mine glittering away in the sunlight.

2011-08-193

IMG_1243

The colour looks darker in the pan than when applied on skin, and while the name makes me think of baked earth and chocolate (as it sounds like a cross between Morocco and Cocoa) it’s actually a lovely pale, glittery nude which I think would work equally well as a brightening daytime shade as a dramatic evening shade.  The glitter translates well onto the skin, which you can see from the swatch on my arm below.

IMG_1240

I have to admit that having worn this shadow all day today I’m kind of falling in love with it a bit.  It’s a perfect glittery nude shade and the quality is very good; not only have I been wearing it today over a creamy primer for a good six hours so far with only minimal creasing, I think it might well be the shiniest, most glittery shadow I’ve ever used – and there wasn’t fall out all over my face when I applied it which is a problem I’ve had with other glittery shadows.  So that you can fully appreciate the beauty of this shadow I’ve also posted a step-by-step tutorial for the look I’m wearing today where you can see how the shadow looks on my eyes.  Basically I think it’s safe to say that this is one not to be missed by glitter fans…and I might just find myself walking past that Pixi blush yet again in order to pick up a few more shades next time I’m in Boots.

Sunday 7 August 2011

Cat’s Eye of the Day: NARS Dogon

I might turn this into a mini-series of my variations on a theme of cat’s eyes as it’s one of my favourite ways to wear my eyeshadow at the moment.

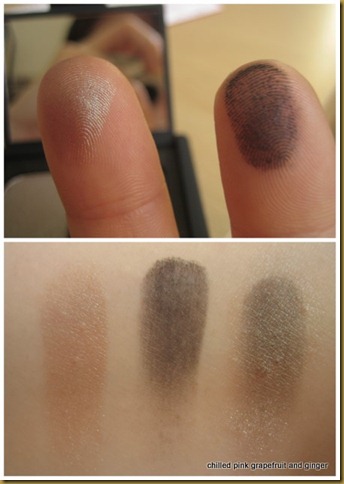
Today I had a play around with my NARS Dogon which I got yesterday.  Hopefully you’ll be able to appreciate the pigmentation in the shots below better than in my initial swatches as I was loathe to actually touch the product too much yesterday because it looked almost too beautiful to disturb!  I love the colours, they’re so multi-faceted and pigmented. 

In the shots below I’m wearing the Dogon duo and mascara – no eyeliner or eye pencil at all.  I used a flat shading brush, a pencil brush and a blending brush to create this look.

IMG_0689

IMG_0690

IMG_0694IMG_0692

Saturday 6 August 2011

My First Taste of NARS

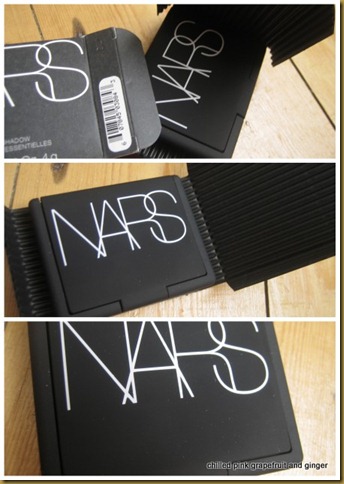
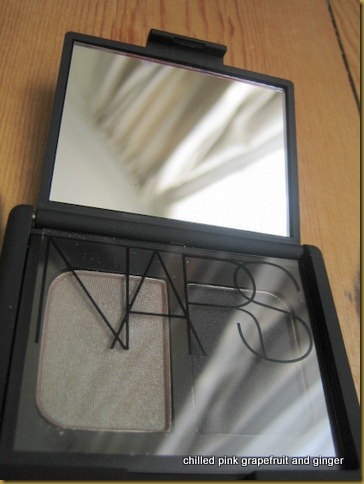
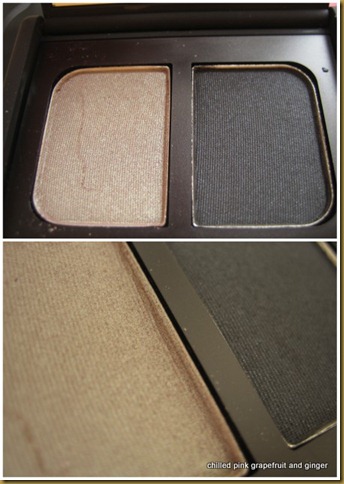
I’m not usually one for indulging in high end make-up but I have to admit that my curiosity was well and truly piqued by the intense online buzz surrounding this particular eyeshadow.  The more I read about it the more I liked the sound of it, and last week I officially cracked.  I put in an order with ASOS (they are currently offering free standard UK delivery), waved goodbye to £23.50, and today took delivery of this little baby: NARS Dogon, welcome to my life.  I may have gone a little crazy with my photos but it’s so beautiful I couldn’t help myself…

2011-08-062

IMG_05172011-08-0632011-08-064

I included my finger swatches because you can see the duochrome effect of the lighter colour when compared with the bottom photo.  The darker colour looks a bit light in these swatches but it is very pigmented – I just swiped it very lightly because it’s so lovely and new looking I hardly dared touch it ha ha.  I also love the fact that you can layer the lighter colour over the darker colour to create a gorgeous shimmery hybrid colour.

I’ll be using this to create more cat’s eyes in a similar vein to my gold and purple one here.  I’m going away for a few days soon and the sleek, hardy packaging will be perfect for slipping into my make-up bag.  This, mascara, a lippie and a lipgloss and I’ll be good to go.

Given that I’ve now managed to spend just under £80 on make-up in under one week (NARS Dogon, a bunch of stuff by Famous by Sue Moxley and the new Urban Decay palette) I’m now officially placing myself on a frivolous-spending ban until September.  I think it’ll actually be a good opportunity for me to better acquaint myself with my current collection and try to focus on what I have rather than constantly thinking about what I can buy next.  That doesn’t mean that I’m going to be on a blogging ban though, I have so much stuff there’ll be plenty for me to write about anyway – including some lovely jewellery that I’ve already bought but haven’t gotten round to posting about yet.  Coming soon!

Gold and Purple Cat’s Eye

Just wanted to post a few photos to show the eyeshadow look I’ve been sporting most of this week in different colours on a similar theme of light and dark.  In these shots I’m wearing two of the shimmer eye dusts that I mentioned in my recent Famous Clearance at Superdrug post in Antique Gold and Party Time:

IMG_0445

I really like this look and today in particular I was feeling quite a retro vibe with it because despite blow-drying my hair as normal I somehow managed to achieve Charlie’s Angels style huge waves in my hair (I like) and my skin and lips were so pale.  My eyes were quite made up so I wanted to balance them with a nude lip and wore my Gosh Velvet Touch lipstick in Cappuccino.  I love this lipstick; it has such a creamy consistency and the colour is absolutely beautiful on the lips.  I’m also going to see if they have a slightly darker shade that can bring more colour to my complexion next time I’m in Superdrug.

My skin looks really pale because for one I wore foundation today which I haven’t done for a couple of months because it’s been so hot, and for another I didn’t bother with any blush.  It may be because of the hot humid weather we’ve been having lately, or perhaps for some other reason altogether but my skin’s looking a bit bumpy and red along my jaw line at the moment with a lot of blocked/inflammed pores so I popped several drops of blended tea tree oil onto my sponge before applying my foundation to hopefully give my skin a bit of anti-bacterial treatment during the day and gave powder a miss, which also meant no blush.  Tea tree oil is probably the most effective skin treatment I’ve ever found for myself.  Usually I pop some on my skin at night before going to bed when I get a break out or flare up and my skin has noticeably improved when I wake up.  It seemed to do the trick again today as I went out shopping just after taking these photos and my skin was a lot calmer by the time I got home.

IMG_0478

2011-08-06

Again this look was really simple to achieve and involved minimal blending.  I used a creamy eyeshadow stick as a base and whacked the gold shimmer dust on top on the inner half of my eyelids, then used a smaller eyeshadow brush to create a winged shape on the outside of my lids with the purple.  I did have to use the purple shimmer dust wet in the end to achieve the intensity that I wanted but I was pretty happy with this look in the end.  I skipped eyeliner as usual and simply finished with two coats of black mascara.

Friday 5 August 2011

Famous Clearance at Superdrug

IMG_0412 IMG_0412
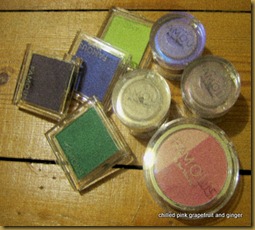
When I went to Superdrug today I discovered that they were doing a clearance of the Famous by Sue Moxley range with everything reduced to half price, so I decided to give a few (altogether eight!!) products a try.  Nothing cost more than £2.50 so the little haul you see above was less than £20.

IMG_0417

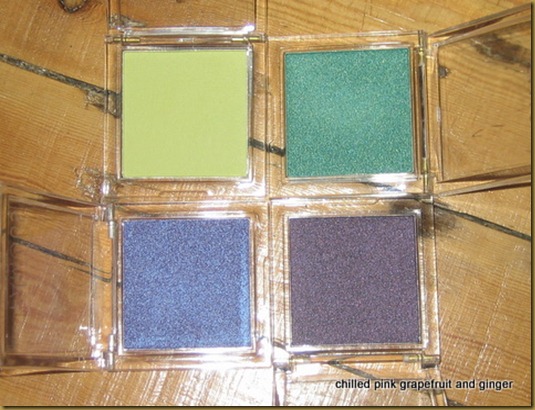
Eyeshadow singles above from top left:

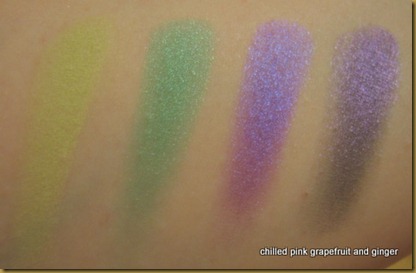
eyeshadow matt shade 4 (light green); eye shadow shimmer shade 7 (emerald); eye shadow shimmer shade 12 (purple); eye shadow shimmer shade 14 (violet)

There was a large range of shadows in both shimmer and matt finishes but when I was swatching the testers in the store I felt that the matt shades were a lot less pigmented than the shimmers so I only picked up one, the light green.  The pigmentation of the shimmer shades is OK to good, but at £2 each for 3.8g I’m not complaining, and I do think that the two purple shades in particular are lovely.

IMG_0430-1

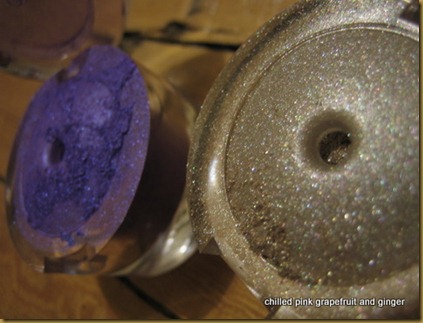
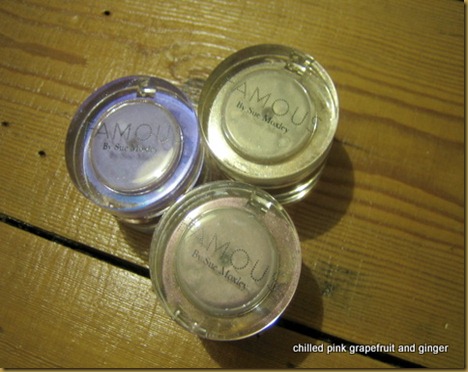
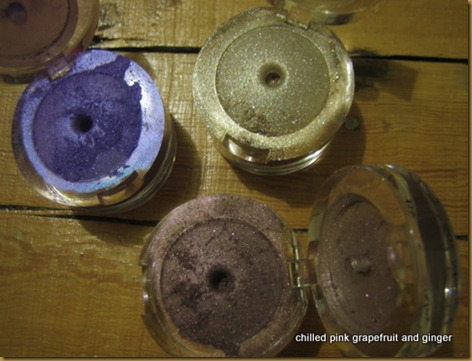
Next up I bought some Shimmer Eye Dusts for £2.50 each.

clockwise from top left: Party Time, Antique Gold, Molten.

IMG_0455

IMG_0436IMG_0445

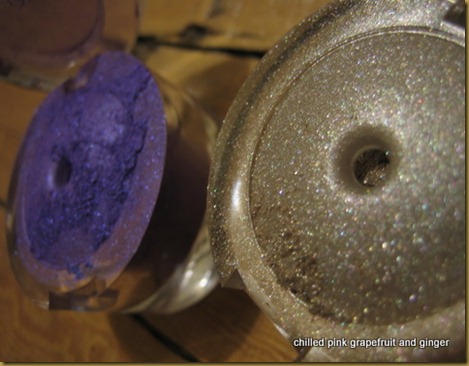
The consistency of these eye dusts is fine and smooth and the colours are very pigmented and shimmery.  However just be careful how you store them as you can see how messy they are when you open them in the picture above!  I wore antique gold with the eyeshadow in violet in a lovely golden cat's eye look today.  (It’s a look I’m really enjoying at the moment so I’ll try to post some pics this weekend). The colours lasted quite well but did seem to fade into each other by the end of the day, but I was pretty impressed by the quality given the price.

IMG_0447

I’m quite into my gold eyeshadows at the moment because they’re flattering and work well in so many colour combinations.  I think Antique Gold above looks great when paired with both the purple and the brown shades.

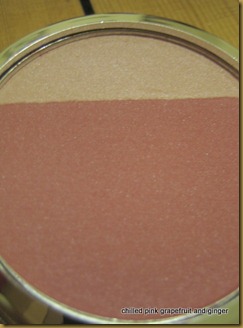
Finally I bought a Blusher with Highlighter in Shade 3 – Country Rose for £2.50 because I’ve been in the mood for a dark pink blusher this week.

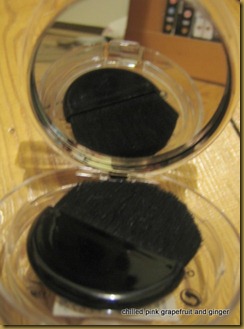
The packaging is really quite dinky, with a see-through lid (I like it when you can see the product) and lower compartment housing a perfectly useable mirror and little blusher brush, although unfortunately I can’t see them being that useful for me as the brush is a bit too scratchy for my liking and I don’t tend to carry a blush around with me in my bag.

IMG_0465 IMG_0467

The highlight is so small it’s difficult to pick it up on its own but it can be mixed in with the blush to varying degrees to create different shades.  I’ve swatched the highlight, blush and a mixture of both below.  I do really like this shade though which is just what I was looking for – something noticeable but quite natural looking and not too dark.

IMG_0468

So if you have a Famous stand in a Superdrug near you it might be worth checking out as you might be able to pick up a bargain or two, and the products are so cheap at the moment it won’t break the bank if you’d like to experiment with some new colours and textures.