Saturday 24 September 2011

Something For the Weekend

This is just a quick post to show you the make-up that I wore today, and my latest must-have accessory…cat’s ears!

2011-09-243

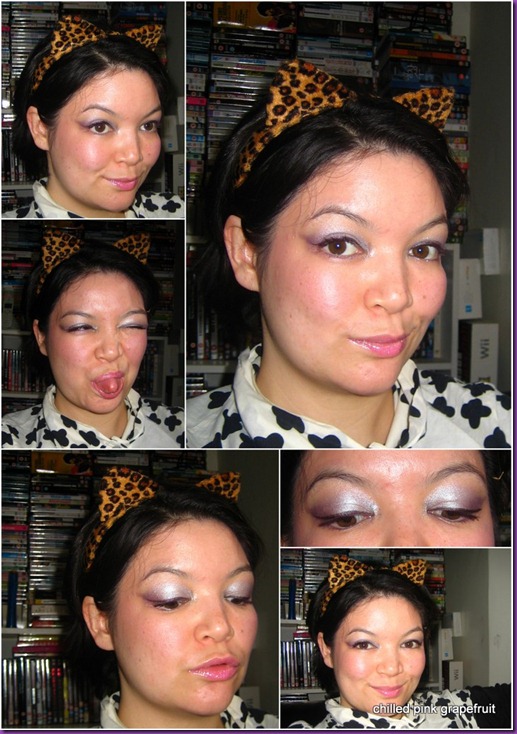
I know that is a super-indulgent number of photos of myself but I just think my cat’s ears are so cute ha ha.  I got them on Fri from H&M for £3.99.  They were with the other hair accessories so I don’t think they’re a Halloween line, but I’m not going to be waiting for Halloween to wear them out and about anyway.  I’ll be wearing them from Friday night till Monday morning every week!

I took these photos after getting ready in the afternoon to go out to a jazz concert followed by dinner (incidentally it was a fantastic concert at the South Bank Centre, definitely worth checking out their programme if you’re London-based as they show some really interesting stuff and tickets are very reasonably priced – I paid £12.50 and the concert lasted 2h).  I’m wearing a silvery-blue eyeshadow teamed with some purple in the outer corner and purple eyeliner and, as always, plenty of mascara.  I’m wearing Rimmel Vinyl Max lipgloss which I just posted about here.

Rimmel Vinyl Max Lipgloss

Lipgloss is one of my favourite make-up products as it’s so quick and easy to apply and I have such naturally pale lips that a strategic slick of gloss can really perk up my whole face.  Today I have a couple of snaps to show you of my new Rimmel Vinyl Max lipgloss in shade 131 Dazzle.  These glosses currently retail for just over £5 full price for 8ml making them a fairly average high street buy, and the tag line on the product is “One Stroke Maxi Shine Lipgloss”.

IMG_2403

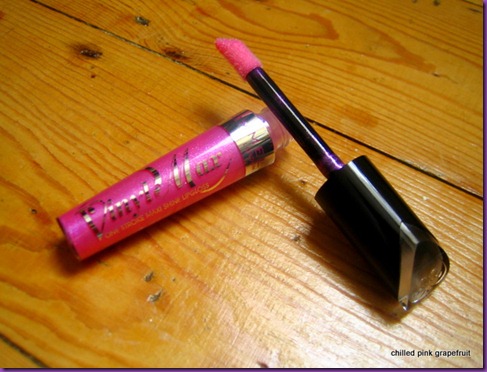
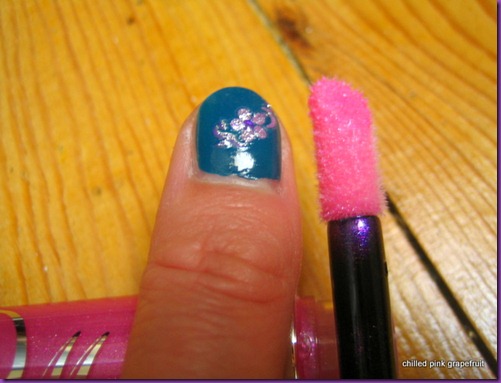
The packaging looks fairly standard, with Dazzle looking a lovely bright pink in the tube.  However the first surprise you get is when you see the size of the doe foot applicator – it’s absolutely massive!  In the picture above it makes the tube itself look tiny but it’s quite large and contains a generous 8ml of product.  The applicator is actually as big as the tip of my thumb:

IMG_2408

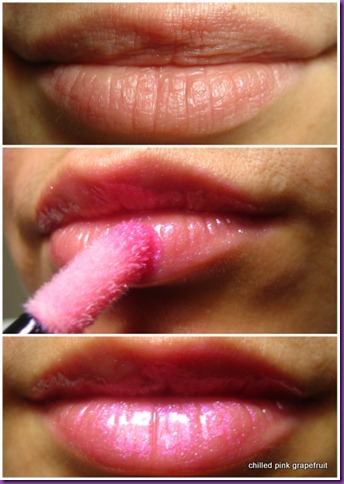
Here’s how I got on when I applied the product on my lips.  You can see in the second photo that the tip of the applicator is indeed big enough to cover the surface of my lips in one stroke.

Top: nude lips, no product

Middle: applying a thick layer of gloss

Bottom: gloss on both lips

2011-09-24

I have to say that in the picture above I am wearing a lot of gloss – the product is actually not very pigmented so in order to get some pink colour pay off I had to apply a really thick layer.  The shine is good though so you will get shine from a thin layer, just no colour, so this product is a safe bet if you like your glosses to glisten rather than be pigmented.

I found the product quite sticky but in spite of this it didn’t last that long on my lips – two hours max with no eating or drinking.  The consistency reminded me a lot of the Rimmel Sweet Jelly glosses which I think are now discontinued and were never a favourite of mine.  The applicator is different to any other I’ve ever tried but to be honest I’m not that big a fan of doe-foot applicators anyway with brushes probably being my favourite form of lip gloss applicator – they pick up plenty of product and allow you to be very precise in your application.  This applicator was also so huge I had to be careful not to get gloss all around my mouth outside my lip line!  All in all I didn’t really like this gloss and I wouldn’t buy it again, but I have had good experiences with other Rimmel lipglosses - their Volume Boosting lipglosses were a particular favourite of mine, although sadly I believe that they were discontinued a while ago (I was really disappointed when I found out as I really loved them!)  I also like their Stay Glossy which has a lovely creamy consistency, is moisturising, and is a dream to wear.  The colour of this Vinyl Max gloss is nice so I will be keeping it in my handbag for everyday wear but once it’s run out I’ll probably pick up a nice bright pink from the Stay Glossy range to replace it with instead.

Saturday 17 September 2011

Colourworks Eyeshadow Palette 2011

I visited Superdrug this weekend and came back laden with lots of new make-up, hooray!  I bought some Accessorize make-up as it’s one of my favourite brands and currently on 3-for-2 offer at Superdrug, and I also got some Christmas palettes as they were also on 3-for-2 special offer and they were just so sparkly and cute looking that I couldn’t resist. 

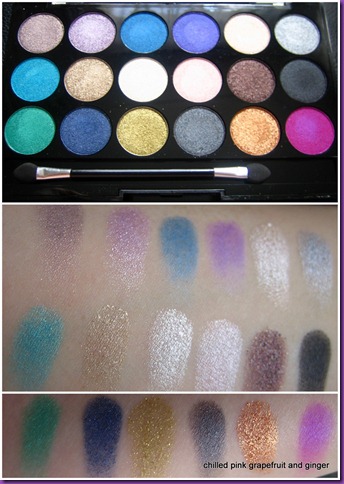
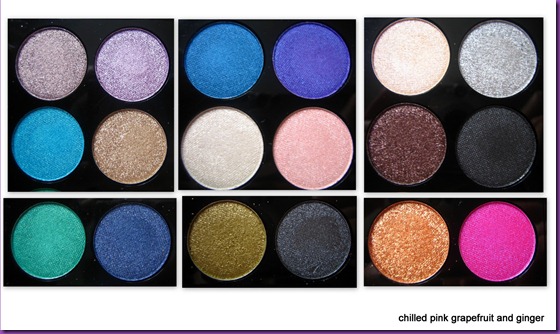
Today I have some pics of one of the Colourworks eyeshadow palettes.  I think it’s a Superdrug own brand but in any case has the leaping bunny seal of BUAV approval that it is not tested on animals which is always reassuring.  Superdrug tend to stock a variety of Colourworks palettes and gift sets in the run up to Christmas each year.  This one contains 18 eyeshadows, each 1.2g, and retails for £7.99 but is included in their 3-for-2 on all gifts promotion which I imagine will run right up until Christmas.

2011-09-17

I’ve left this picture quite large so that you can click on it for a better view.  I was attracted to this set by the selection of colours which I think is both very on trend and wearable, and a good mixture of brights and neutrals.  I have to say that when I was making swatches I was also very impressed by the quality – some of the shadows did feel a bit gritty but on the whole they applied well and were pretty pigmented.  The texture is very soft and creamy, so I did make a bit of a dent in some when I later applied some with the sponge tipped applicator that was included in the set, but for the price I’m really not complaining at all.  Most of the shades are shimmery and there are also a few glittery ones.  I think they are very comparable to Superdrug’s MUA eyeshadows which retail at £1 each.

I also created a collage of all the shadows in the palette at slightly closer range so you can click on the photo below to get a really good view of the shadows.

2011-09-171

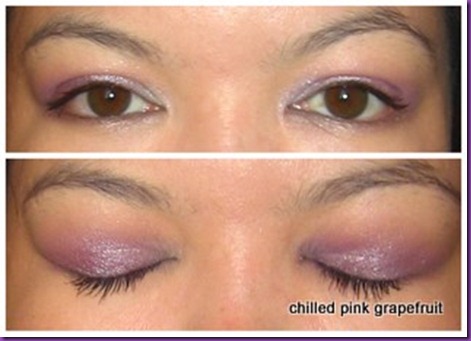
Here are a couple of quick snaps of the look that I wore today which used the two colours in the top left of the palette + a shimmery highlighter in the inner corner of my eye.

2011-09-18

The colours were easy to apply and lasted all day over a primer, so I’m really pretty impressed by this palette so far.

I also purchased a set of 7 lipglosses for £7.99 and got a set of 5 nail varnishes free as part of the 3-for-2 special offer (rrp £6.99) which I will try to post pics of later this week.

Sunday 11 September 2011

Softly Smokey with MAC Me Over’s Lady Grey

After doing some research (i.e. reading numerous other blogs!) I decided to pick up a couple of items from one of MAC’s current collections, MAC Me Over.  It’s a huge collection containing 51 items altogether which was really an overwhelming selection but I eventually settled on one of the two eyeshadow quads and a shadestick.

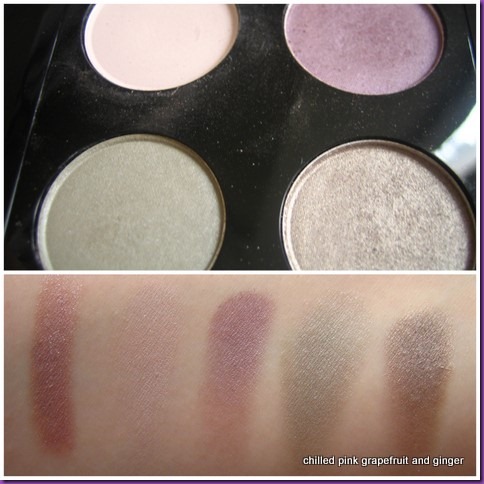
I bought the shadestick in Heirloom which makes me think of light purple heather and the quad in Lady Grey which contains three coloured mid-tone greys and a light matte pinkish shade.

I didn’t get a good photo of the shadestick, which is a bit annoying as I was going to say that although I quite like this product I think the packaging is a bit disappointingly cheap looking and I do think it’s quite overpriced for what you get.  They are retailing at £13.50, for which you get 1.5g of product, but I’ve found that I use quite a lot of product each time so I don’t think it will last that long – certainly not as long as a normal powder eyeshadow.  That aside it is a beautiful shade and is great for a super-quick pick-me-up when you’re in a rush in the mornings.  Here I’ve applied it just in my crease and along my lower lash line and I think it gives a lovely glint to my eyes.

2011-09-111

Lady Grey definitely contains the most sophisticated shades in my make-up collection to date and I love them all.  My immediate thought when I look at them is “soft smokey”.

2011-09-11

Shades in top picture clockwise from top left: All Races, Tendersmoke, Hazy Day, Lady Grey

Bottom pic left to right: shadestick in Heirloom, All Races, Tendersmoke, Lady Grey, Hazy Day

My current favourite shade is All Races because it’s just so easy to wear.  In the pics below you can see me wearing All Races all over my lids on top of the shadestick in Heirloom, which seems to bring out lilac tones in it.

2011-09-112

I also love the “daytime smokey” look that can be created with this palette.  In the pic below I’ve just added Tendersmoke in my crease and Hazy Days along my upper and lower lashlines and finished with mascara.  I think the result is both subtle and beautiful.

2011-09-113

I’ve been wearing this look for about 12h now and it’s still all present and correct on my eyes so I have no complaints about longevity.  I would definitely recommend this palette for fellow brown-eyed ladies out there as the lilac/purple tones seem to be very flattering to my eye colour; I’m not sure of the effect on other eye colours but this palette is a bit of a gem so if you’re interested I’d say it’s definitely worth going to check out at your nearest counter.  I got mine from Debenhams for £33.

Wednesday 7 September 2011

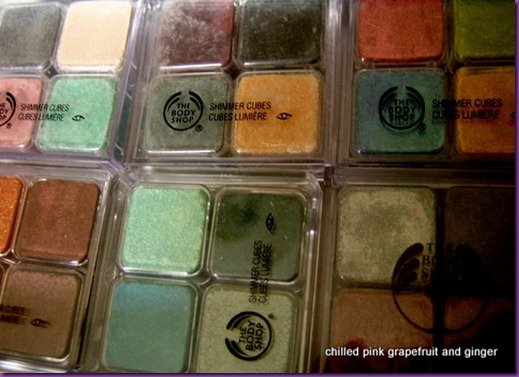
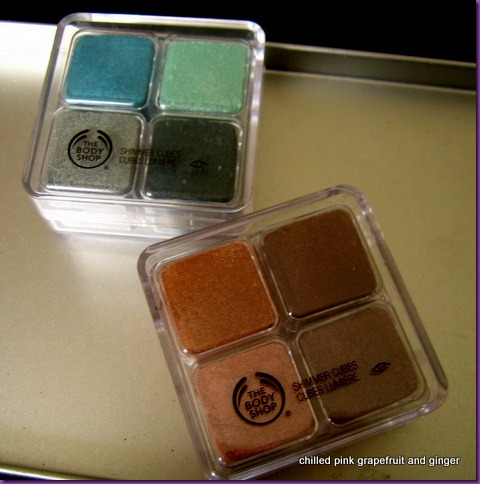
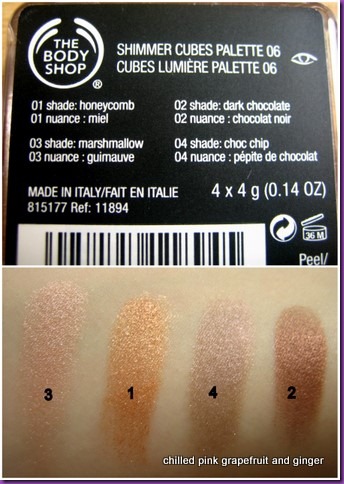
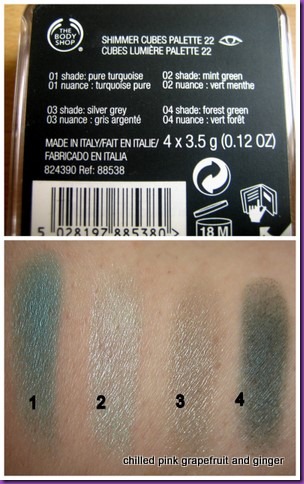
Body Shop Shimmer Cube Palettes 06 & 22

I love Body Shop shimmer cube palettes; I even store mine in their own special tin box where I can admire them like some kind of exotic sweets…

IMG_2039

They normally retail at £16 so I only buy them if they’re on sale or there’s a special offer and happily for me Body Shop were offering 30% off to Loyalty Card holders so I took the opportunity to add another two to my collection for just £11.20.  You get 4 x 3.5g of product which is a huge amount of eyeshadow and I’ve hardly ever managed to make more than a tiny dent in any of mine so it does represent good value for the amount and quality of product that you get.

They can be used wet or dry but the colour pay off ranges from very subtle to intense, so it’s a good idea to check the testers before buying as the colour in the pan doesn’t always reflect how they will look on skin.  I think they’re mostly limited edition and at the moment I think there are currently five palettes on sale in The Body Shop.  I bought the green palette which is 22 and the brown/warm palette which is 06.

IMG_2040

It’s testimony to how much I love these that I actually bought a palette full of browns as I’m really not a neutrals kind of gal, but these colours just look so delicious that I decided to buy them.  Their names are absolutely perfect as they reflect exactly what I think of when I look at them:

2011-09-72

I almost feel like rushing out to buy a Cadbury’s Crunchie and a hot chocolate when I look at these colours, mmm!

I think my favourite colour from the green palette is 03 Silver Grey because it’s quite an unusual colour and makes me think of antique metal.

2011-09-07

All these swatches were done dry in natural light.  As the name would suggest they are all very shimmery so best avoided if you like your colours matte, otherwise if you love a bit of glimmer it’s definitely worth adding one or two of these little beauties to your stash.

Tuesday 6 September 2011

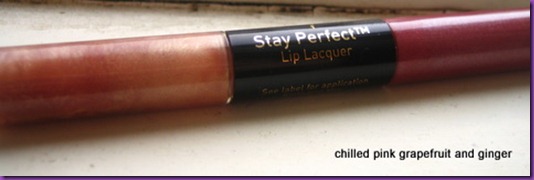
No. 7 Stay Perfect Lip Lacquer in 25 Plumberry

I got a couple of No. 7 £5 off vouchers this month so I decided to spend one of them on a new lipstick.  I was going to go for yet another neutral shade but luckily for me I happened to be with a friend at the time and she advised me to try a shade that was a bit different to the normal browns that I go for and I ended up coming home with this:

IMG_2020

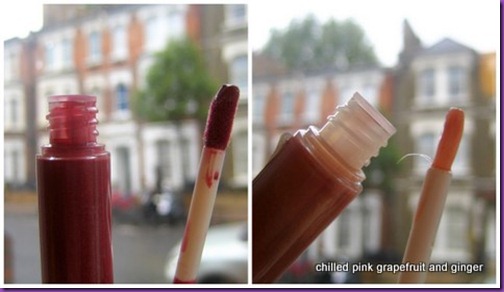
It’s a Stay Perfect Lip Lacquer which is a double ended product, one end being a long lasting colour that you paint on and the other end being a gloss that can be worn alone or popped on top of the lip colour for extra shine and moisture. 

The lip colour has a doe foot applicator while the gloss comes with a brush.  I have to admit that I’m not the hugest fan of the doe foot applicator as I find that you have to be careful to get an even application of colour and create the shape that you want.  If you wanted to be really accurate you should probably use this in conjunction with a lip pencil but that’s just so long winded – not great if you’re rushing about in the morning or if, like me, you often end up applying your lipstick on the bus!  I do like the brush that the gloss comes with though, which is actually pretty good at applying the gloss.

2011-09-063

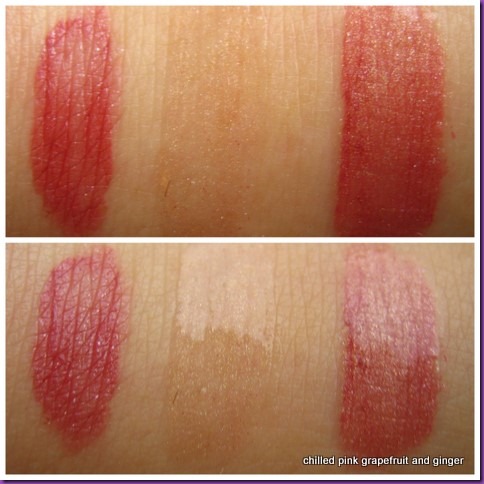
Here’s a quick swatch on the back of my hand to show the lip colour alone, lip gloss alone, and gloss on top of the lip colour.  Both photos were taken in natural light w/o a flash, I just took them from different angles to capture the shine.

2011-09-062

I was a bit surprised by the colour of the gloss the fist time I wore both it actually because it seems a bit light for the lip colour. If you put too much on it totally alters the colour of the lip colour, but in a weird way because in effect you’re wearing a gold over a berry colour so it ends up as some kind of in-betweeny shade which I didn’t really find flattering.  I’ve found that wiping one side of the brush before applying the gloss as well as spending a few seconds to really blend it over the lips helps.  However, I do love the gloss when worn alone and have a sneaking suspicion that I am going to run out of the gloss side of this product long before the lip paint…

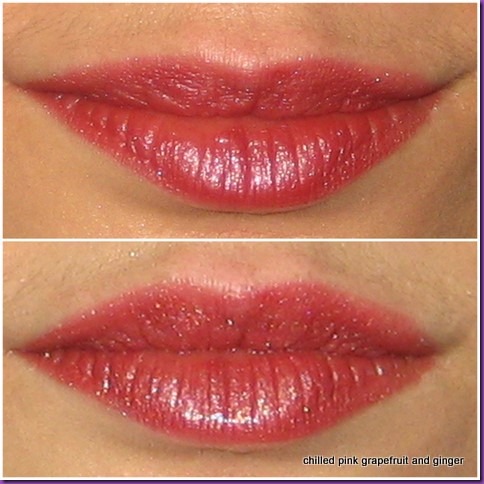
Anyway this is how my lips looked when I applied the product this morning – in the top pic I’m just wearing the lip colour, and in the bottom pic I’m wearing some gloss on top.

2011-09-061

I really like the colour and think it’s the perfect half-way shade to ease me into the bold berry shades that hit the shops every autumn as I’ve been wearing nothing but neutrals this whole summer long.  I think the bottom pic illustrates a little bit what I was trying to describe with the gloss changing the colour – it looks much lighter and quite different.  The lip colour takes a few minutes to apply as the applicator is not the greatest and you have to wait for the paint to dry before applying the gloss otherwise it would smudge and leave you with patchy lips – not a great look.  It doesn’t dry out the lips too much though, which I have found with some other long lasting lip paint type products, which was good.

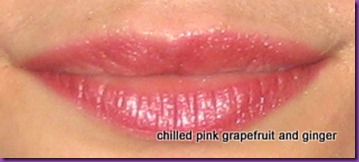
I went out late in the morning today and spent about 4h walking about, stopped to have a burger for lunch and later on a milkshake before finally rocking up back home about 6h later.  I reapplied the gloss once while I was out, but not the lip colour. Here’s how my lips had fared:

IMG_2014

To be honest I think that’s a pretty good performance!  The colour has faded away on the very inside of my lips, but it’s definitely mostly still there and that’s after having eaten a burger too!  When you eventually do want to remove this lip colour you can use an oil-based cleanser for the speediest removal, otherwise just work away at it for a bit longer with a creamy cleanser.

This product usually costs £10.50 which for the reasons I’ve outlined above I think is a bit overpriced.  However, if you have a No. 7 £5 off voucher then I would say it’s definitely worth picking up at £5.50 if you’re looking for a long lasting lipstick and you don’t mind the bit of extra effort that this requires to apply and remove.  I have a couple more vouchers so I might go pick up another few shades for me and my mum before the offer expires in fact.

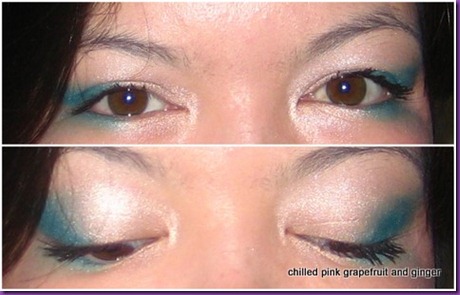
Just before I go here’s a sneaky shot of my eye make-up today, which I created using a couple of colours from my Urban Decay 15 Year Anniversary Collection.  Just look at that blue – further evidence that Urban Decay are amongst the best for vibrant colour.

2011-09-06

Monday 5 September 2011

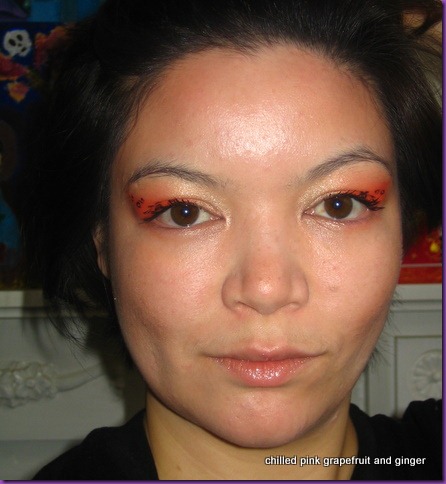
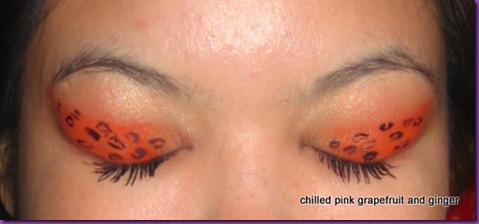
Cat’s Eye of the Day: Leopard Print

I enjoyed wearing yesterday’s texturised eyeshadow look inspired by grass so much that I decided to wear another texturised look today.  This time it’s a Cat’s Eye in two senses of the word embracing both the shape and print.

IMG_1985IMG_1988

This is another super-easy non-blended look – my favourite kind!  I used a couple of shadows from Sleek eyeshadow palettes as they have some great vivid colours.  You could really use any colour combination for this look.  First I applied the peachy orange from the Sleek Primer Palette as a base then I blended a light shimmery gold using a large eyeshadow brush all over my lids up to my brows.  I then patted on a matte orange eyeshadow in a triangular shape on the outer 2/3 of my eye.  I did take a few minutes to construct the shape and blend it out at the edges – this was the part that took the longest.  I then added my leopard spots using a liquid eyeliner by Gosh – they’re perfect for this pattern as the consistency is a bit thick and they’re waterproof.  I have quite watery eyes so a waterproof eyeliner is essential for this kind of look for me otherwise it’s smudged all over my lids before I’m out of my front door (I speak from experience!)

I then finished up with loads of black mascara, bronzer (I used one by Accessorize that perfectly suits my pale skin), radiance powder by Pixi and lipgloss.  I hadn’t worn bronzer for ages and I’d forgotten how amazing it can be for sculpting the face – I have to admit that I am posing terribly and sucking my cheeks in a bit in the top photo, but I just couldn’t help it!

Sunday 4 September 2011

5 Minute Smokey Eye

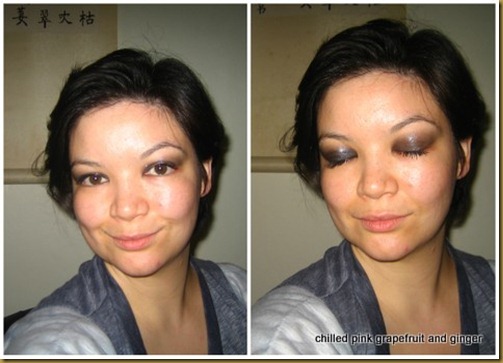
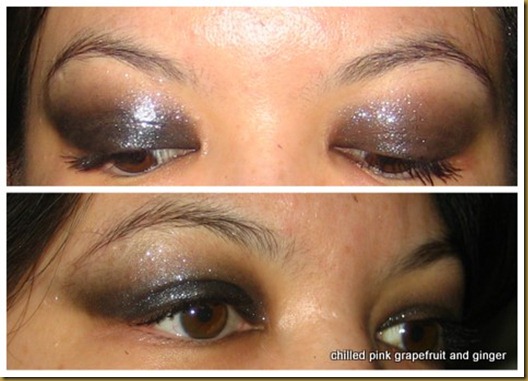
What do you get when you have five minutes, one awesome sparkly black eyeshadow and a domed eyeshadow brush?  Well, I managed to come up with this:

2011-09-034

I created this look not because I was going out and running late (I do not have an exciting night life at all these days ha ha) but to showcase an eyeshadow from my new favourite range, Blingtone by Myface Cosmetics and to show just how simple it is to create stunning effects with them.

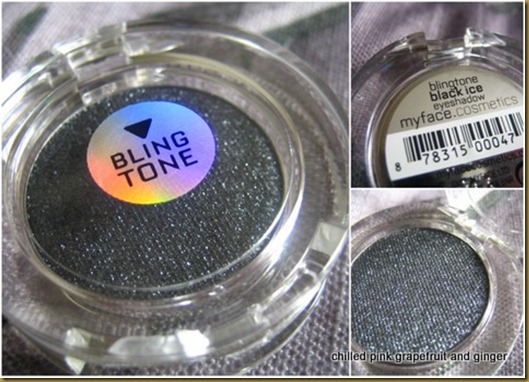
Here’s the shade I used today which is the most recent addition to my small but quickly growing collection of them, Black Ice:

2011-09-036

I actually used a primer on one eye (the black from the Sleek primer palette) and none for the other just to show the difference.  The black cream primer makes the colour more intense and the shape more defined, with the shadow going on more of a charcoal grey when used by itself.  The difference is a little bit more obvious in the close up shots below – primed eye on the left; unprimed eye on the right.

2011-09-035

I think the end effect is stunning and it was so simple to create.  I just used a domed eyeshadow brush to pop a generous helping of shadow all over my lids to the crease then without adding any more colour used the same brush to blend the colour at the edges, then finished with plenty of black mascara.  The eyeshadow is great quality – it applies intensely, is easy to blend and lasts all day.  They blow my previous favourite glitter eyeshadows which were by Urban Decay out of the water because the glitter in these doesn’t spill all over your face unlike certain glitter bombs by UD.  I’ve been buying Blingtones at the rate of one a week since my first one and I’ve been so impressed with them so far that I don’t think I’m going to be able to stop now until I have them all!

Myface Cosmetics are available from selected Boots and online direct from Myfacecosmetics.

Grass Eyes

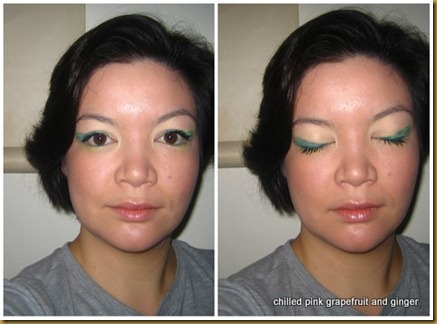
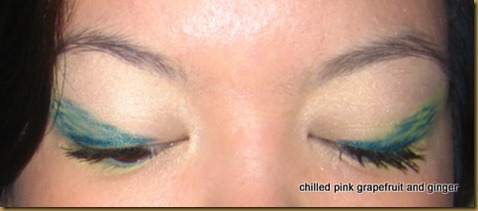
I went to the flower market on Columbia Road near Old Street with a friend today so to mark the occassion I created an eye make-up look inspired by grass blowing in the wind.

2011-09-04

IMG_1935-1

I used Urban Decay primer potion as a base then applied a light yellow eyeshadow all over my eyelids up to the brows.  I then patted on a light green on the outer corners of my lids and along the outside of my lower lash line.  I applied the green in a very approximate fashion as I just wanted to get some colour on without worrying too much about the shape.  I wanted to use a green liquid liner for the next step but to be honest I couldn’t remember where I’d put mine (oops!) so I had to use a green eyepencil instead.  I would say that this has to be done with a very smooth eyepencil, as you really don’t want to be tugging away at your poor eyelids as you create the “blades of grass” effect – ouch.  I used a No. 7 metallic eyepencil which is lovely and creamy and applies with practically no pressure.  I just applied strokes of green outward across the outer 2/3 of my eyelids in a triangular shape and lined along my upper lash line.  I then finished the look with a generous helping of black mascara, and that was it – simple.  (I’m also wearing foundation, radiance powder on my cheeks and lipgloss in the photos above).

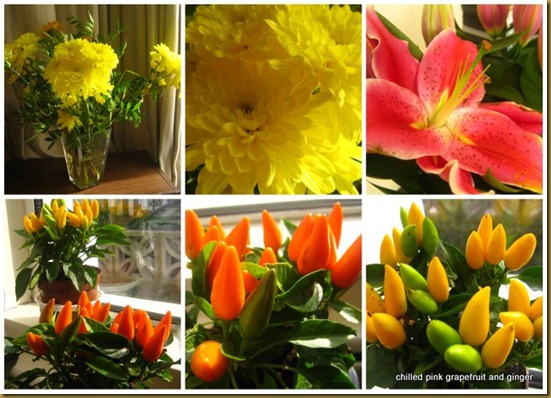
The flower market was amazing and I definitely recommend a visit if you live in London.  We did get caught in the rain but on the plus side that meant that we got even more bargains as the flower sellers tried to encourage people to keep spending instead of just rushing off home.  Here’s a quick collage of some of the flowers I currently have adorning my home – the bottom row shows two of my new chilli plants, which have the double benefits of being both colourful and edible, yum!

2011-09-43

Saturday 3 September 2011

August Bank Holiday Shopping

What’s a girl to do when a bank holiday weekend creeps up at the end of August and gifts her with an extra day off work?  Erm, spot of shopping anyone??  Here’s are some of the goodies that I picked up last weekend and this week.
2011-09-032

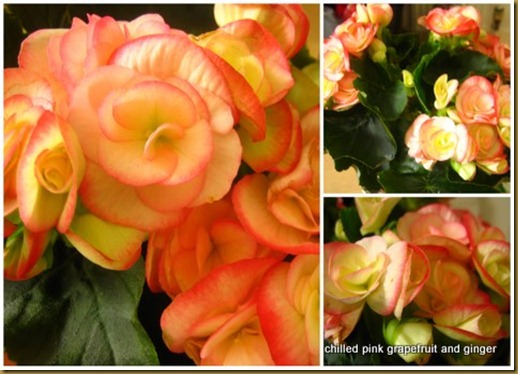
New pot plant from Tesco, £2.50.  That makes my sixth pot plant in two months…it’s becoming a bit of an addiction!  I just love their pretty colours though.  This one’s a begonia.
2011-09-031

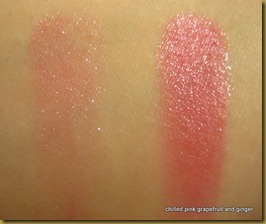
(The swatches below were both done with shadow used dry, there are two just to show how the colour looks applied heavily compared with blended out.)
IMG_1819

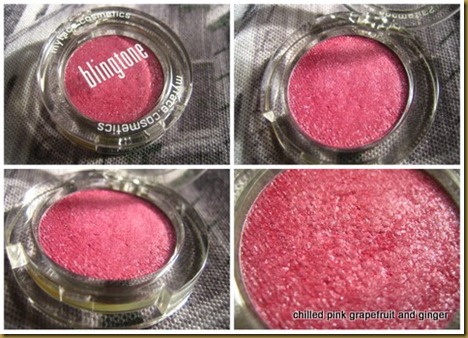
Blingtone eyeshadow in Raspberry Beret by Myface Cosmetics, £7.99 (usually £9.99) from Boots. 

I was so impressed by the first Blingtone eyeshadow that I bought in Morococo that I picked up another one the next time I passed a Myface stand in Boots.  I’ve only owned this for a week and am absolutely in love with it already.  The consistency is very smooth so it takes about three minutes to whack some on and blend out with the same domed eyeshadow blending brush, then I’m good to go with a fresh daytime look (pictured a little further below).  The colour is…well, I think the name says it all.  It’s a gorgeous flattering shimmery pink and even though it’s packed full of glitter it actually stays on my eyes and doesn’t fall all over my face unlike other glitter eyeshadows I’ve tried.  On me it lasts all day over Urban Decay primer potion and I’ve only experienced minimal creasing by the end of the day even when I’ve just worn it alone.
2011-09-033

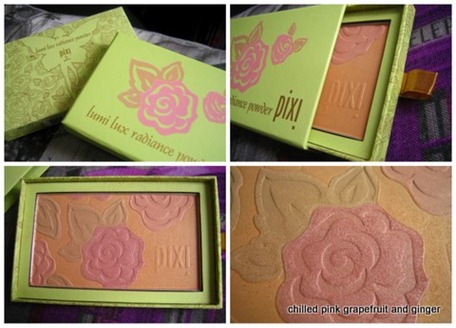
Pixi Lumi Lux Radiance Powder, £16.50 from Boots

I’d lusted over this from a distance for a while (it’s just soooo pretty, right?) but I’d been put off by the price tag until I finally just cracked and had to buy it.  I thought it would be more of a blusher but actually the pigmentation is very subtle so I like to swirl a fluffy blusher brush all over the product and dust it over my cheekbones, temples and the bridge of my nose.  It’s really easy to apply because you don’t have to worry about blending any harsh lines as the effect is rather subtle.  In fact the first time I wore it I did think, “Is that it?!” but actually I do think it does what it says on the tin and adds radiance to the whole face – photographic evidence below.
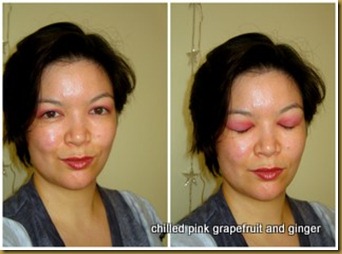
2011-09-4

Me wearing Raspberry Beret eyeshadow and Lumi Lux Radiance Powder and nothing else on my skin (I am wearing lipgloss though but haven’t included that in this post).  I think that I do look more shiny and happy than my bare-faced self.  I took these photos after I’d been out for five hours today and it was quite warm, so you can see that both products seem to have quite admirable staying power.

I bought another eyeshadow that I haven’t tried out yet but I can still show you the pretty colours.
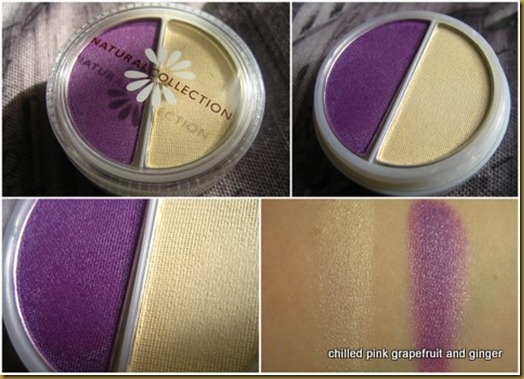
2011-09-037

Natural Collection Duo Eyeshadow in Vanilla/Plum, £1.99 from Boots.

Yes folks, you read that right, only £1.99 for a duo eyeshadow weighing 5g – what a bargain!  Well, I am yet to wear it so maybe I should reserve judgement on just how much of a bargain it is just yet ha.  Anyhow first indications with my swatches were all promising; nice smooth consistency with good colour payoff.  I think the shades are a great combination too and although they’re called vanilla and plum the yellow made me think of bananas which is why I just had to buy it!

I also bought a new Bourjois mascara completely on impulse as there  was a special offer.  I got this rather weird and wonderful looking contraption:
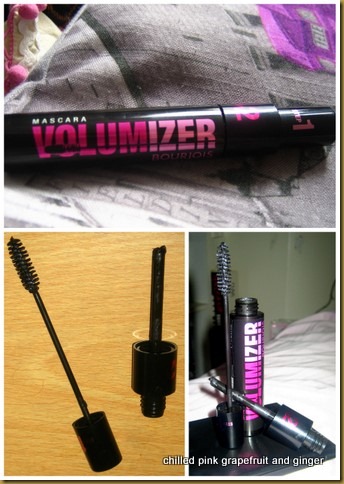
2011-09-039

Volumizer mascara, Bourjois, £5.99 from Boots (special offer).

It’s a mascara with two lids so basically you can use step 1, which pulls the brush through two stoppers and clears off most of the mascara for a light and natural daytime look, or you can use step 1 then follow that up with step 2 which only pulls the wand through one stopper which leaves a lot of mascara on the wand which you can use to create a huge, voluminous night time lash look with.  To be honest it’s a bit difficult to describe and my pictures really don’t do it justice, but I quite like this mascara so far and when I’ve used steps 1 and 2 (I have such sparse lashes that I would really never bother to go for a mascara that was just promising a “daytime” look though) I have been left with quite noticeably pumped up lashes.  My only complaint is that I find Bourjois mascaras quite difficult to remove so it doesn’t quite beat my current favourite Collagen Mascara by Accessorize.

The last pics I have to show today are of my latest Blingtone eyeshadow which I picked up today.  This shade is Black Ice and it’s the perfect eyeshadow for creating a smokey eye with.  Check out my post here if you don’t believe me or would like to see further photographic evidence to back up that claim!
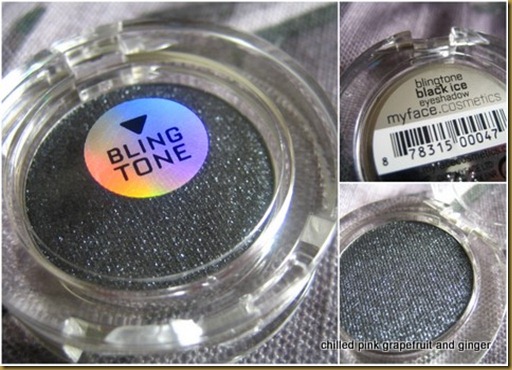
2011-09-036

(The swatches below were both done with shadow used dry, there are two just to show how the colour looks applied heavily compared with blended out.)
IMG_1862